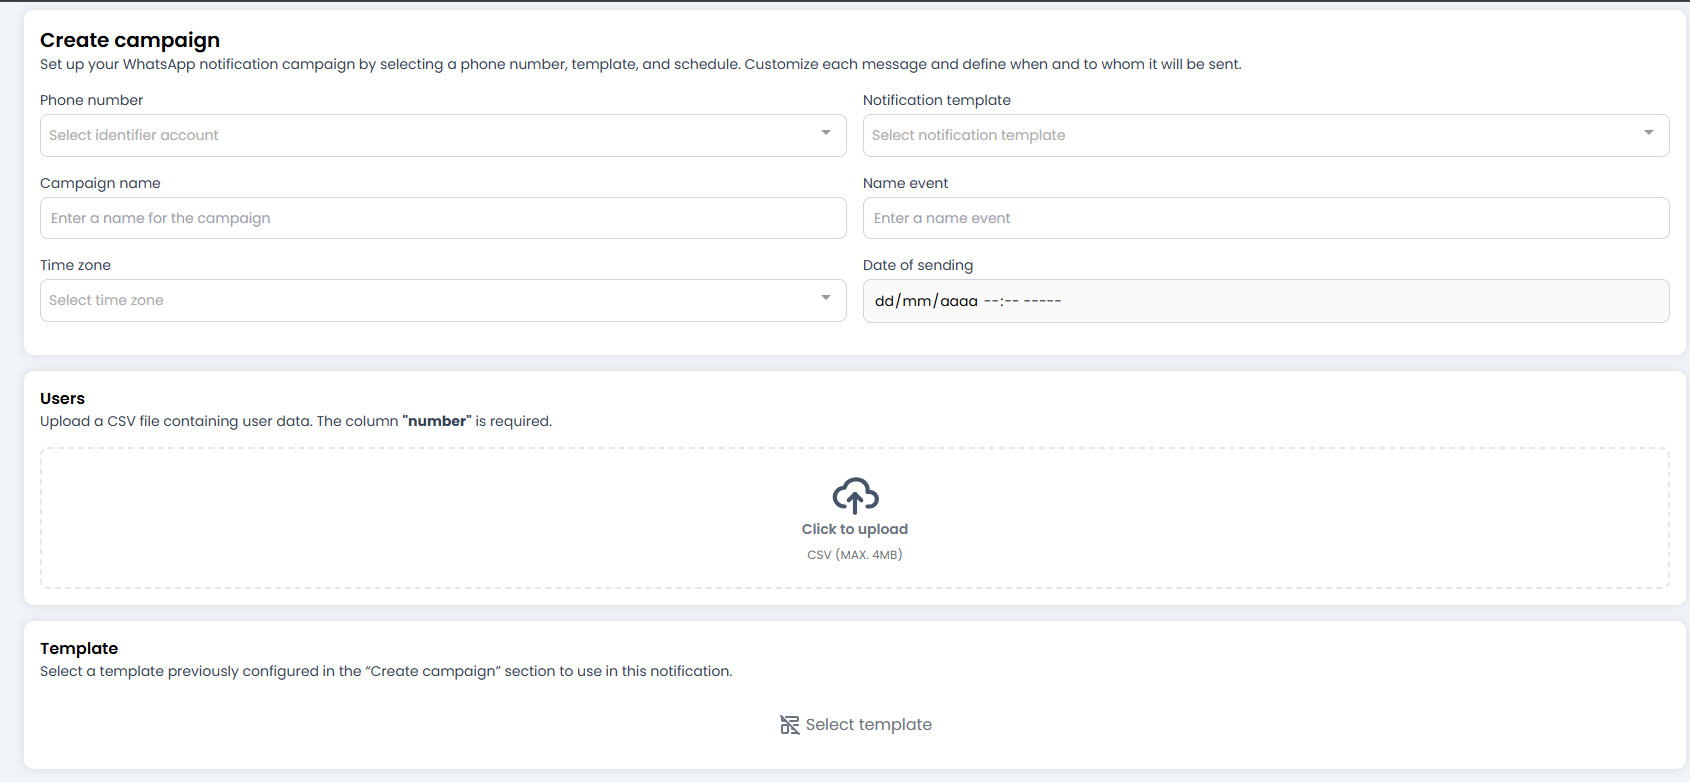
📝 1. Launch Configuration (The Fields)
Fill in these details to define the identity of the campaign:- Phone number: Select the number the messages will be sent from. If you have several (Sales, Support), choose carefully.
-
Notification template: Choose one of your approved templates.
- Note: Only templates that have the green light from Meta (Status: Approved) will appear.
-
Campaign name: A name for your own reference. Something like
Summer_Promo_2024. - Name event: A technical identifier for the event. Useful if you use webhooks or external integrations to track when this specific campaign is launched.
⏰ 2. The Time Factor (Scheduling)
Time is relative, but in marketing it is critical.- Time Zone: Very important! 🌍 Select the correct time zone. You don’t want to send a “Good morning” message at 3:00 AM because you selected the wrong time zone.
-
Date of sending: Set the exact date and time of the send.
- The system will schedule the delivery for that precise moment.
👥 3. The Audience (Users CSV)
This is where you upload the list of customers 😄 You must upload a .CSV file (maximum 4MB) containing the details of the people you want to contact.⚠️ The Golden Rule of the CSV:
For everything to work, your Excel/CSV must follow one sacred rule:numbercolumn (Mandatory): There must be a column called exactlynumbercontaining the phone numbers with the country code (e.g.447700900123). Without this column, the system has no idea who to contact.- Variable columns (Optional): If your template says “Hello
{{name}}”, your CSV must have a column calledname. The system will automatically fill in the gaps using the data from each row.
👁️ 4. Verification (Template)
At the very bottom you’ll see the Template section. It is not editable; it’s just a visual reminder so you can confirm: “Ah yes, this is the template I want to send.” Make sure it matches what you expect.❗ 5. Error: “Params Words Ratio Exceeds Limit” (templates with too many variables)
Occasionally, when saving or validating a template/campaign you may encounter an error similar to the one shown in the screenshot: The error message typically reads something along the lines of:
Invalid parameter - OAuthException - Params Words Ratio Exceeds Limit - This template has too many variables for its length. Reduce the number of variables or increase the message length.What does this mean? Meta (WhatsApp) enforces rules about the ratio between the number of variables in a template and the total length of the message. If a template contains too many variables relative to the total word count, validation may fail. What to do (quick steps):
- Consult the official Business Messaging error codes to understand the exact cause and code: https://developers.facebook.com/documentation/business-messaging/whatsapp/support/error-codes
-
Review the template and reduce unnecessary variables:
- Combine fields in the CSV into a single column before uploading (for example, use
full_nameinstead offirst_name+last_name). - Replace multiple small variables with a single broader variable (for example,
{{1}}= “John Smith, VIP customer”).
- Combine fields in the CSV into a single column before uploading (for example, use
- Increase the length of the message if possible (add non-sensitive descriptive text), to improve the words-to-variables ratio.
- If you truly need many variables, consider creating several templates with fewer variables each and selecting the most appropriate one per segment.
- Test the template in a staging environment or with a controlled number of phone numbers before launching to production.
- Avoid using variables for content that is constant and could be written directly in the template.
- Validate the CSV: ensure the variable column names match exactly those referenced by the template.
- Add a short technical note to your template library (for example: “uses fields: full_name, order_id”) so colleagues preparing CSVs do so correctly.
🚀 Fire! (Save)
When you click Save, the campaign is Scheduled. It won’t go out immediately (unless you selected the current time); instead, it will patiently wait in the queue until theDate of sending.
You can go to the Campaigns module (the one we saw earlier) to see it with the status “Pending” until its time comes.
All set! Configure it, upload your list, and wait for the results. 📈